Email integration

Setting up an email integration
1.
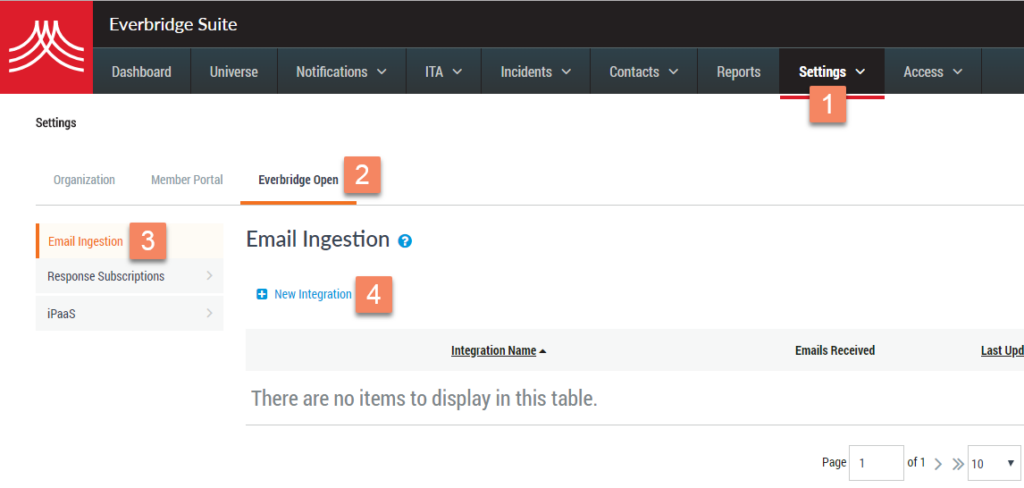
Navigate to Settings > Everbridge Open > Email Ingestion.
Once you are here, click New Integration.
2.
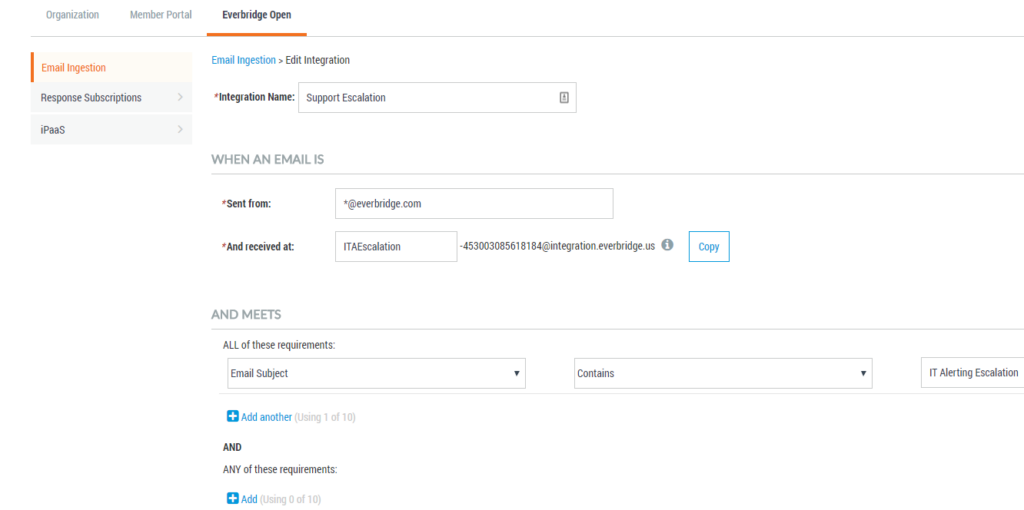
Enter a name for this ingestion, provide the email address that will send the email to Everbridge, and enter the beginning of the email address where Everbridge will receive the email.
An asterisk can be used as a “wildcard” for the Sent From email address. You can also enter specific verbiage requirements for text found in the Email Subject and/or the Email Body, but this is optional.
3.
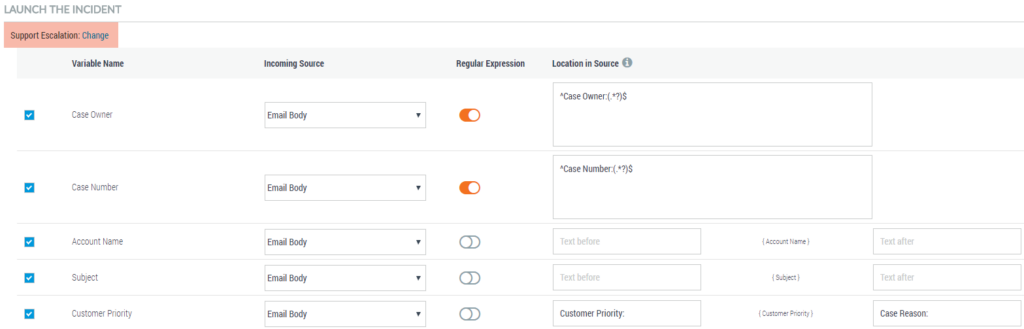
Choose the Everbridge Incident that you would like to trigger based off these emails. Once you choose, the screen will populate with the different variables from that Everbridge Incident Template. For each variable, decide if the value should populate from the Email Body or the Email Subject and then choose how Everbridge should determine the value of that variable.
- Input the text that should come before the value you want and the text that will come after the value
Or
- Use Regular Expression to programmatically search for that value
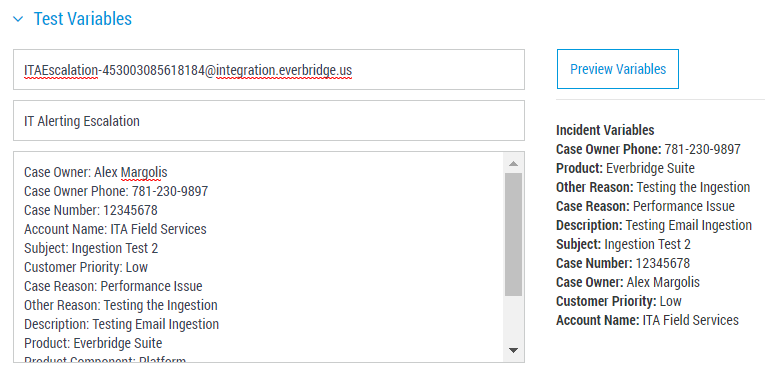
4.
Test your variable searching below by pasting the email that will be sent to Everbridge into the box below. Make sure to include the Received At email address and the Email Subject as well. Once your email is added, click Preview Variables on the right to ensure that Everbridge will capture all your variables properly. Click Save when complete.
5.
That’s it! Your email ingestion is ready to receive emails.
Ensure that you point your systems to the Everbridge Received At email address and your emails will trigger Everbridge incidents.